Thursday, 31 January 2013

You gotta have heart.... more Valentine stuff....


Just before Christmas a very dear friend I work with suddenly produced a huge stash of red buttons on cards and said - 'I saw these for a couple of quid in some shop and thought you could make something nice with them'. Sounds like a challenge!!

The buttons are nothing special, although judging by the cards they were on look quite old but not vintage. I had the large heart base in my stash (gifted by someone a while ago - netty? was it you?) but it's very thick and I wasn't sure about drilling holes through it (OK the truth is I am way too lazy to try and find my dremel) so I mounted it on a canvas and put a hanging string on that. The buttons looked really wrong 'naked' so I laboriously tied a little knot hrough each one - much better. I even got out my needle and thread again (this will not become a habit) to do the running stitch border. The heart looked a little boring with just the buttons, so I added a little fabric flower.  I'm not sure my friend was angling for a present but she's going to get it anyway. And I've still got a lot of those buttons!!


Quick reminder/final plug - last chance to enter the January Art Draw!! Click here to go the the relevant post. Closes 9.00 pm this evening.

Tuesday, 29 January 2013

Try It On Tuesday - Valentine's!!

So the TIOT challenge this fortnight is 'Get ready for Valentine's Day' and we would like you to include at least one heart on your project (which doesn't have to be a Valentine's card).

I had a couple of projects in mind for this DT project but in the end I plumped for going with an attempt at a vintage valentine. Once I get an idea in my head I just have to run with it!!

It is part digital (printed out) and part some bits from old collage sheets and 'scrap' I had in my stash. It's also a pop up card (not sure if that is clear from the photos).

Not sure how true to the originals this is but I think it's kinda cute!


Crafty-emblies is our sponsor for January, with a £10 store voucher for our lucky winner this month.


Just remember that to be considered for Top 5 and the Prize Draw you must only link to 5 challenges in total including ours. Don't forget to visit the other DT members at Try It On Tuesday and check out their projects as well!!

Monday, 28 January 2013

Hello Monday.....

ooh it's a grey day today but I'm sooo glad all that white stuff is gone - yesterday was the first day I have felt warm for weeks!!

Anyhoo a quick tag for the current Out of A Hat Challenge which is 'Clocks'.

Do you like the little clock I made? I had the base blanks from something we did at work with the kids (they were the winners medals) and just before Christmas I covered a load of them up with paper and glossy accents to make little Crimbo decorations - some of you may have got one with your Christmas card.
One of the Christmas ones I made
When I bought my docrafts magazine last week I thought I would try out one of the free stamps for size - it fits perfectly!
Might have gone a bit mad with the crackle glaze though!!


and another pair....

So I think the ones I have left will be made up as little clocks - you can never have too many clock embellishments can you?

Have a great Monday x

Sunday, 27 January 2013

Polkadoodle card

Don't you just hate when you've done something for a challenge and forget to upload? All the time! But I just have time to speed blog this piece I did for the Polka Doodles Week 3 Blog hop.


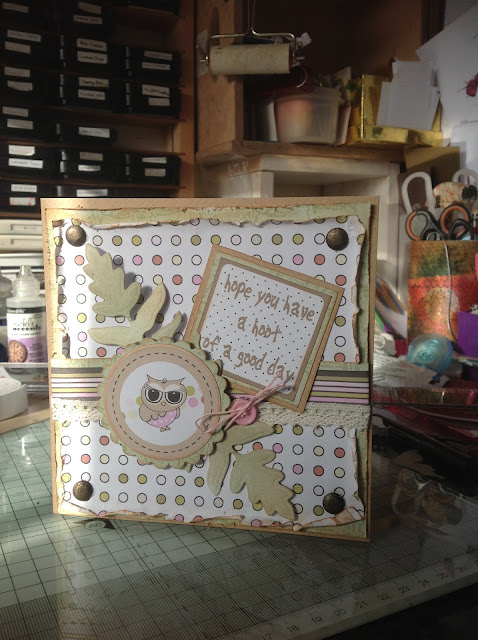
A simple card using some digi images and papers from the 'Back to Nature' CD. Still don't think my printer is printing 'true' but pinks and greens don't seem too bad. Not a great photo but running against the clock here.

I am putting this card into the polka doodles challenge ' stitching and lace' and also the 'Anything Goes' current challenge which is buttons and bows.

Oh yes, and I won the Week 2 polkadoodles challenge challenge with my little card here. Woo hoo!!

Thursday, 24 January 2013

Tim's Tags 2013 - January

Well here we go again!! Tim's Tag is here, and the main techniques for this tag are embossing, distressing and a bit of stamping - simple, but as usual put together in Mr H's signature style.

Once again I hope to make two tags a month, 1 to keep and 1 to give away.


- Don't have any kind of clock or gear embossing folder, but used my 'that special touch' gears mask through the GC to get an embossed effect. Inked up with the same inks as Tim - Rusty Hinge, Iced Spruce and Stormy Sky - as this was not a combination I woud have naturally put together. It pays to experiment, I liked it but I was a tad heavy handed - out of practice I guess. Edged with walnut stain.

- I only have die cut gears on heavyweight card as I don't posess the die. I painted them with my adirondack metallic dabbers, pouncing them to get texture. I have missed a few spots and they look a bit bright - no worries we're going to grunge them up - I like to add distress embossing powder to anything 'faux' metallic as I really like the effect. Although there are all sorts of colours, I only have one - tea dye - which I have had 4EVA, it never seems to get any less even though after clear EP I use it the  most. Anyhow, once I have heated it and rubbed a little (you could add it before the paint dries) I colour with inks or whatever to get the colour I want. (Looks cool on real metal as well).

- No film ribbon so stamped image onto acetate. Being acetate I used Stazon, despite the likelihood it will eat my acrylic stamp and so went immediately to clean it. For reasons I don't fully understand I squeezed my stazon cleaner bottle really hard causing the cap to pop off.
Well that was a mess I hadn't planned on.

- Guess who didn't read 'archival ink' when stamping on the ribbon? I'm pleased to report that it also works if you colour it first then stamp (for the second time because the DI you used initially ran ....). Like the effect though, stamping ribbon is cool.

- Finally chose my sentiments and added a few metal gears. I have to admit to being a bit more frugal with these than Mr H, but they do add a certain finishing touch.

So there's the first one, 11 more (or 22 in my case) to go. If you haven't seen it already and would like to enter my January Art Draw for a set of 12 Tim inspired tags a la Tags of 2012 then you can find the relevant post here.

See Ya Soon.


Wednesday, 23 January 2013

Out of A Hat - squeaking in....

A REALLY quick card because as usual I left it till the last minute - I'm really not that good with weekly challenges!!

Current Challenge at Out of a Hat is 'Most Useful Stamp'. Well it's not very exciting but I could really only choose this tiny text stamp from My Mind's Eye. It sits permanently on the corner of my desk on its own acrylic block, is used all the time (there is a laziness factor in here I do admit) and seems fairly indestructible. Being acrylic it is also useful for taking off the block, squishing up and random stamping - technical ain't I? I have no idea what it says or what language it is supposed to be, Elvish for all I know.

Funny enough the second most useful stamp is the little swirl that came in the same set and lives by its side. Who knew, I now realise I only had to buy one stamp set after all!! Could have saved myself a fortune.

Anyhow here's a little project using it as a background stamp. Not that inspiring but it was quick!!

The main image is from a Wendy Vecchi set and while getting it out I found a completely uninked Studio 490 set that I bought in the sales. Perhaps a challenge to get out your least (or try NEVER) used stamps would be more useful - but which one would I choose??


(YAY!! Blogger picture browser is back!! Just a note in case you have been struggling with HTML like me, it's time to try again)


WOYWW # 190

Wednesday again. Time for a trawl of crafty blogland to see what everyone is up to. Here's mine.

A staged close up as I realised you couldn't actually see them properly!!
No stamps to be cleaned this week - wow this being organised kick is lasting longer than I expected. Slept very badly last night, so got up and did a bit of late night crafting - if I wasn't now so tired I would be very pleased with what I did!! Have been thinking about doing some original artwork that could be used to make digital stamps (not that I even have a clue how to do that LOL) and these are my first attempts. Whaddya think? Kind of my take on she art (mainly cos you can get away with no hands, feet and faces if you want LOL). Two of them will fit on some little canvases I've got so that might be my next project. Maybe. I have downloaded a drawing app for my ipad as well but that's as far as it's got. So many projects, so little time...

I thought I'd also show you some of the stuff on my wall, finally found a few nails and put things up (OH rolled his eyes). Unfortunately I haven't got a lot of space left so I'm having to be quite frugal with the in between spaces. (Terrible photo - sorry!)

Anyhow, I've shown  you mine, if you want to show yours then hop over to the instigator of the weekly walkabout we call What's on Your Workdesk Wednesday, Julia Dunnit of Stamping Ground, and just join in. 

Finally just a quick alert/reminder - If you want to enter my Monthly Art Draw click here before 31st Jan. If you want join in with my PIF (anyone? or am I flogging a dead horse?) click here.

See ya Soon!!

Monday, 21 January 2013

Pay It Forward 2013

Pay it forward 2013
 
I have signed for the PIF being run by Pam Dodwell at Pam's Space and so here is my blog post offering the same.
 
The first 3 people who leave me a comment here and agree to offer the same on their profile, will receive a gift handmade from me, this year! Who knows what it is but I will make it for you.

It maybe a card or something else handmade, & I will get it to you by the end of 2013. When I send it to you will be entirely up to me!

All you have to do is to copy and paste this to blog or facebook status (and I will check) if you do and are one of the first three then you will receive a handmade surprise from me.

See Ya Soon! Cindy

Sunday, 20 January 2013

Polkadoodles Blog Hop

Just a quick card from me using a free Emma Canning digi image courtesy Week 2 of the polkadoodles blog hop which finishes at 12.00 noon on 20 January 2013. All of Emma's images are delightful and can be found in the polka doodles shop. Once again I am challenging my OCD by putting my bits at an angle - scary stuff lol!!

But even if you missed this one you can join in again next week for Week 3. Pop over here for details.

See ya Soon!!


Friday, 18 January 2013

While Dragon's Dream.... mystical fairy tag

A very quick tag for the Dragon's Dream Tag It On Challenge. The instructions were a sort of recipe

"This time we would like you to dream along with our Dreaming Dragon, with mythical creatures, a night sky, a clear moon and as always at least one real stamp".

Well I haven't got a dragon stamp or any other mythical creature so went with a fairy - goodness Tinkerbell will  be cross with me for suggesting they are mythical!!

Sorry about the photo - really must remember to get out of the way of the light source!!

Hope everyone is OK with all this snow. Brrrr, don't much like the white stuff myself so have hidden inside all day but will have to work tomorrow.

See ya Soon.

Thursday, 17 January 2013

More projects with artist spackle....

as I said recently my huge pot of spackle had got a bit dry (I must have had it over a year) so I had to mix it with water to be able to use it. Tried it out with a new Mr Huey mask. Quite liked the results but these masks are quite thin so some care needed I think.

Here's a tag, you can just see a bit on the bottom right hand corner. Oh yeah, sorry THAT stamp again and ANOTHER shabby flower. And in a VERY similar vein, a card. I'm not too sure about this one, I had to try very hard to make these bits work together and I'm still not convinced. But the texture from the mask is nice.
This has been inked and sprayed with mica. I like the way the mica settles in the crevices. yuk, those colours do go a bit better IRL!!

And finally something a bit more quirky but basically using the same mask. I like the random way the spackle has gone through the stencil (intentional, of course!).
The stamp is by Donna Louise Rodgers.

Note to self: get a different stamp set out!!


Wednesday, 16 January 2013

What's on Your Workdesk Wednesday # 189

Hello everyone, it's Wednesday again - how the weeks fly!

Here's my desk this week, a little valentine project on the go today.

A different type of flower (with the button) on show today as well as some of shabby ones I made last week. Fairly tidy for me (if you ignore the box of stamps to be cleaned)


I also thought I'd share my new ribbon storage idea - after years of having them all in different boxes that exploded every time I looked for a piece of ribbon I decided to clear out two of my desk drawers and do this. It may not seem that big a deal but for me it's right up there with putting my DI blending pads on velcro. Can actually see what I've got and the messy bit can be rummaged through without everything going on the floor. Much better.
Anyhow I've shown you mine, will you share yours? If you want to join in with this week's nosy shennanigans then hop on over to Julia's blog and put your name down. You never know who will come and visit!!

Tuesday, 15 January 2013

Try It On Tuesday - Let's get Stitchy!!

Or perhaps this post should be titled 'The art of knowing when to stop'.

So to get to my DT piece for this week. It is a fully loaded 8 x 8 canvas. It started from the big blowsy flower which came in an embellishment kit - gorgeous but a bit big for a card - which gave me the creamy/peachy colour tones and well, it kind of grew from there!!


OK we asked for stitching on this week's project's at TioT and there is stitching on my project although it may be hard to see as the layers have obliterated most of the stamped and faux stitching. However I can assure you the lace ruffle is handstitched, as are the swirls on the piece of fabric (I even did a bit of beading). The idea for that being that the stitched work would marry up with the stamped swirl behind - kinda worked!!

There are a lot of layers and also texture in this piece though mainly abstract as my spackle was a bit lumpy and hard to manage through non-use (until I remembered you could add water - doh) so I couldn't use my masks. I've done a few other pieces in tandem with this one that were more successful in that regard but I'll post them later as this is a TioT Challenge post. The rolled roses and shabby flowers are handmade and spritzed with micas and the leaves have been DI'd and embossed with Distress embossing powder to give them a rough and multicoloured texture.

 I always find it hard to know when this kind of canvas is finished - to be honest the first layers of paper were so pretty I couldn't cover them up for a day. Anyhow it gave me a chance to use some new stamps (had them since September!!) and have a rummage in my stash and I think it will look nice on my wall.

So now you've seen what I've done it's your turn - but don't worry you don't have to go crazy you can do any kind of project to any theme with real or faux stitching.
Crafty-emblies is our sponsor for January, with a £10 store voucher for our lucky winner this month.
Just remember that to be considered for Top 5 and the Prize Draw you must only link to 5 challenges in total including ours. Don't forget to visit the other DT members at Try It On Tuesday and check out their projects as well!

Because this turned out kinda pretty and feminine I am entering it into the current 'Our Creative Corner' Challenge for which the theme is Shabby Chic.

Happy Crafting!!


Sunday, 13 January 2013

Working the Cuttlebug..

The current challenge at Artful Times is to use two or more folders on a project. Like Neet, I was a bit flummoxed by the notion but thought I'd let it simmer.

Quite coincidentally, I was looking for confirmat
ion that I could use a certain die in my cuttlebug before ordering it and I came across this 'Double Cuttle' tutorial which explores using two embossing folders together. Result!! (there are a few other cuttlebug tutorials there if you are interested although the blog itself seems to have lapsed a bit lately).

The idea is to emboss the same piece of paper twice using two different folders, highlighting the first impression with inks or whatever and after running through with the second folder highlighting the second impression. The best advice as to choice of folders was to do the busiest one first, and all I can add to that really is perhaps use a background type folder first and then one that is more an image.

I used a diamond background folder and then the leaf folder (can't remember the names but I'm sure any buggies out there will recognise them). I used some mini ink pads to highlight each time. In a moment of madness I found some chipboard leaves and embossed them as well with 'divine swirls' - so 3 embossing folders for me!!

Here's the finished 8 x 8 card with some pink accents, my new gorjuss stamp, shabby flowers and a sentiment at a jaunty angle. (I remark on that only because it makes me really uncomfortable)


Here's a tag madewith the same folders plus a dotty one  - yep,  I managed to use three folders again! Another shabby flower (get used to it, I made a lot of them!!)


Then I wondered what it would look like if I stamped first and then embossed. So I tried out another tag, stamping 'LOVE' and the swirl before embossing with my dotty and hearts folders. Kinda like this, I think there are definite possibilities there. I'll gift this one to the first person who asks, I haven't put any embellies on it so it could even be a bookmark but be aware it isn't sealed.

Enjoyed that challenge, really like it when something prompts me to make use of the thin
gs I've already got in a different way - and it is soooo simple, do have a go.

See you soon.

Please note: still jumping through hoops to upload so apols if anything looks weird - never know till I publish quite what is going to happen!!
 

Thursday, 10 January 2013

Boxing clever...

Today an altered box.

This was the original one I liberated from my mum. Apparently she had a regular supply that has, alas, now dried up. The demise of the independent corner newsagent. She has a few more sitting on her shelf, they might not be there long.


Once again kickstarted by a Craft Stamper Project and a challenge at the Crafty Emblies Challenge Blog ( Toy, Toy Box or Toy). This challenge blog is only for altered art, no cards and atcs allowed.

It's amazing what you can do with a bit of paint and and embossing powder. The box base took no time at all, the bits to decorate a little longer although that big flower was made some time ago. I won't really be keeping any secrets in it, that's just a bit of whimsy, I don't have any secrets to keep (those that know better should keep that information to themselves).

Back soon.


Wednesday, 9 January 2013

Is it still Christmas?

Well I hope you'll forgive me, but my Christmas stuff is still out (In my OHs office as he keeps pointing out but I keep ignoring him). I used this funky digi image from  Delicious Doodles to make a card for my son's girlfriend (not blogged) but obviously printed out more than one at the time so thought I might as well use it. I also had a part sheet of double sided sticky sheet that has been moving around my desk since November which I decided to use up over another scrap of beautiful Tapestry paper to make my own patterned gllitter paper. Voila a seasonal card with a bit of a difference and a lot of sparkle.
 
Another one for the advance pile for 2013!

Challenges:

 'That Craft Place' Challenge where they are still in the Christmas spirit until the 20th January
 'Craftymess Challenge' which is sparkle and bling.
Dream Valley Challnge - Anything goes!

Back soon!!

WHat's On Your Work Desk Wednesday #188

Well, this week I have been busy. Crafty busy. And Tidy. And Organised.
OK, go and lie down in a darkened room.

Here's the piccie. Taken Tuesday night, but I won't have time tomorrow.


Yummy flowers yes? Here is a link to one of the many tuts available on the web. These are for my next DT project. Curious? Yeah well I'm not entirely sure myself where it is going. I may have made a tad too many, but once you get started they are quite relaxing and not that challenging...

Anyhow, you've seen my desk. Now get yourself over to Julia's and join in. Trust me, whatever kind of crafty desk you have you will not be alone.

I am at work all day Wednesday so won't be visiting till late. I won't get round them all, but leave a message and I will visit yours, it's only polite after all.

Big Silly Grin on my face. A small amount of Happy Dancing.  Just heard about 1st June. That date is so in the diary. Try and stop me.

Happy WOYWW.

Tuesday, 8 January 2013

Craft Stamper Inspiration

Every now and again I get a guilt trip about my collection of magazines (do like a bit of eye candy!!) that I read once and do't try out anything. Rather more frequently I have an even bigger guilt trip about all the stamps I have that don't get used. Looking back through my blog it would seem I am not as much of a stamper as my level of supplies would suggest. So looking for kick start here's a card and tag made following a tut in January's Craft Stamper. The colours really called to me.


I didn't follow the instructions exactly (well, what did you expect?) but pretty pleased with them all the same. So then I did my own version in different colours. Like these too.

 
One thing I did decide after all this time is that I don't like working with inks direct to my card blank. However careful I am to clean as I go I always get ink all over the back and then the finished project looks a mess. So in future I will do all my inkwork as a topper and then mount on the card blank. Looks much better. Oh and the blogger photo thing is still not resolved . I have managed however to get the photos the right way up but does mean I can't edit anything I want to publish as I think that may have been why they were turning around. So much more careful initial framing is required, not just my happy snap that I crop later. That can only be a good thing right? LOL see ya soon.

Friday, 4 January 2013

Birthdays again.....

Sorry about the upside down pictures but blogger via IE9 is playing silly buggers again this afternoon and I really cannot be bothered to change browser to try and sort it out, I might come back later and try and sort it out (or is life just tooooo short?). Currently  I can only upload pics in HTML and I can get them to load facing left, or facing right, but not the right way up. Yet another great IT mystery that I'll probably never get to the bottom of.

Anyhow, the birthday cards just never stop do they LOL? I've already had two this year and this is the third.


A quick digi card I made for my nephew - look at me, even did a liner for the envelope!! I never really know what to do with teenage boy cards. I was going to do a photo card but seem to have filed my last set of photos somewhere strange on my pc. I do have a system (?) but the collection is getting so big it's still hard to manage (and when I'm feeling lazy I occasionally save things any old where - my bad). But I'll have to put a whole day aside to sort that  particular mess out.

And here's a little teacup card I made as my response to the 'Out of a Hat' Team's invite to the Mad Hatter's Tea Party. Didn't turn out quite as expected but just a bit of fun!! What would your reply look like? Or wouldn't you go?


LOL, on the whole it's not been a very good day on the pc (printer been playing up as well) but I'm still smiling.Hope you haven't got a crick in your neck.

Gotta go make a rocket now. Or should that be build a rocket? I've got Elbow on the CD player.

Thursday, 3 January 2013

January Art Draw - Twelve Tags Tim Style

This is the set you will receive
It's time for the January Art Draw which some of you may recall I said was going to be a set of twelve tags based on the Tim Holtz Twelve Tags of 2012. Wherever possible I have tried to follow Tim's tutorials and these are my take on the tags he made staying as true to the original ideas and techniques as materials and ability allowed. Some are fairly direct copies and others much more interpretive but I hope that you will like them. 


A couple more photos in more detail. I don't think the February one with the heart was ever blogged as we I did it out of sequence. The same goes for The September Industrial Tag, really like how that one turned out.


The November tag in fall colours wasn't blogged either. I love my little pine cone!!
 
Just for completeness here is the set I am keeping for myself.
 
 
Yes, I can count, I know there is one missing. I was looking at it earlier and now can't seem to put my hand on it........
 
And finally here are my 11 tags displayed on a big split ring. I will be posting the winner's set out packed flat but I'll  include a ring so you can do this if you want to.  Sorry about the lengthy post but wanted to make sure you know what you are getting. So, if you would like this set of tags all you have to do is leave a comment on this post before 9.00 pm on Thursday 31st January 2013.
International players welcome, feel free to link from your own blogs (if you let me know you have I'll put you in the hat twice).
 
I really enjoyed making the tags, even if I did feel a bit under pressure at times and the payoff is I have a ready made giveaway item.  It's time to start the Tags of 2013 so if this is well received I may do the same for next year (Nothing like planning ahead is there.........).
 
Did you know this giveaway has been running since February 2009? Where on earth has all that time gone! So thanks to everyone who has supported me over the last 4 years (some of you have been here since the beginning!) and here's to the next ........ well, let's not get too far ahead of ourselves!!                                                


What's On Your Workdes Wednesday - n#811

  Morning deskers, welcome to the weekly Wednesday Blog Hop WOYWW which  is now being hosted at Sarah Brennan's blog. Here's the lin...